Missions in Dark Alliance presents a list of various tasks and Missions that a player can acquire and enlist throughout the game. Missions are usually unlocked through the main campaign, completing a missiongrants various rewards that can aid the player throughout their journey. This page covers a full list of all the Missions that can be unlocked or obtained in the game. You can find a complete Walkthrough for each Quest by clicking on them.
Dark Alliance Missions

 Tutorial
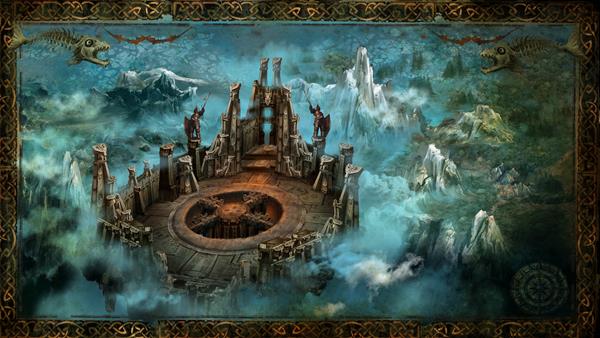
Tempus, The Lord of Battles, calls forth the greatest warriors of Icewind Dale to prove they are ready to face the challenges yet to come.

 Trials of Tempus
![]()
Story Missions
Story Missions in Dark Alliance are divided into three different acts. Each time you complete an Act, the next one becomes available, and once the three acts are completed a different Mission unlocks.

 Companions of Icewind Dale
Bruenor's people have fled their home, driven out by new threats that have come to claim the Crystal Shard.

 Goblins at the Gates
![]()
![]()
The united peoples of Icewind Dale had defeated Kessell's armies and destroyed his Crystal Tower.
But the dwarven warriors of Clan Battlehammer returned home to find their halls overrun, their people fleeing the valley.
We rushed to their aid, fighting our way through the goblins and verbeeg to find the goblin commander and put an end to this siege.

 Halls of the Duergar
![]()
![]()
![]()
It was not the goblins that drove the Battlehammers from their halls. It was duergar. They came from the Underdark and had penetrated the lower Halls, exposing the dwarves to attack.
With the dwarven warriors off fighting Kessell, those dwarves who remained behind were no match for the invading duergar.
Before the Battlehammer Halls could be secured, we would have to seal the duergar breaching tunnels.

 Bangor's Span
![]()
![]()
![]()
The duergar we faced were but an advanced force of legions on approach along Bangor's Span - the lone gateway to the Underdark.
Dwarven sappers had collapsed bridges and tunnels all across their domain, but they had been unable to reach the Span.
It was up to us. Destroy Bangor's Span and the duergar army would be safely stranded in the Underdark. But we would first have to face the elite force of duergar holding the Span's entry.

 The Goblin's Shard
A goblin named Hamboog claims to have found the Shard and has taken over a part of the Dwarven Valley where his horde is building him a "Crystal Tower".

 The Goblin Valley
![]()
![]()
![]()
Goblins had begun constructing a tower to secure their foothold in Bruenor's home, and had spread out from that stronghold into the Dwarven Valley.
The first step to clear out the goblins was breaking into the goblin fort guarding the entrance to Rugrib's Quarter.
We would have to recover explosives to blow our way through their fortifications and then take out the foreman and his verbeeg enforcer.

 Goffin's Door
![]()
![]()
![]()
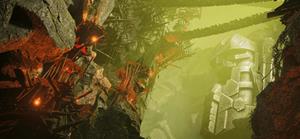
Emperor Hamboog, he called himself. This goblin claimed to have found the Shard, but what his goblin horde was constructing was no Crystal Tower.
There was only one way into the canyon where Hamboog was building his tower. Its entry was held by Goffin's Door, but the door's runestone locks were scattered across Rugrib's Quarter.
And so before we stormed the tower, we would recover the runestones, engage those locks on Goffin's Door, and seal Hamboog in.

 The Goblin Tower
![]()
![]()
We had sealed Hamboog within his canyon, but left unchecked, he would eventually break free.
If that happened, all of Ten-Towns would suffer raids from his goblin horde. And so now was the time to assault his throne room.
Once Hamboog was defeated, we would tear down his tower and restore dignity to at least part of the Dwarven Valley.

 Verbeeg Jamboree
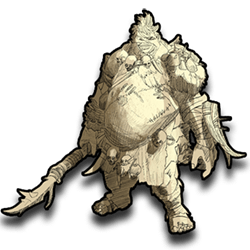
The Verbeeg have taken control of Annugaron's Forge and slaughtering any dwarf in sight.

 The Verbeeg Jamboree
![]()
Verbeeg and goblins had worked together to invade the Dwarven Valley, but some had broken off and had taken Annuragon's Forge.
We would have to take out the verbeeg holding the forge gates before dealing with whatever horrors we would find within.
To fin the verbeeg, we would only have to follow the sound of their voices.

 Designs of the Duergar
![]()
![]()
![]()
![]()
Though dwarven sappers had cut off access to the forge from their Halls, the verbeeg managed to break in through the exterior gate.
What we didn't count on were the duergar who had their own designs on Annuragon's Forge.
The duergar had hidden the runestone keys to lock the forge gate. We would have to recover those keys before we could enter the forge and deal with the verbeeg inside.

 A Feast for all Cretins
![]()
![]()
Verbeeg. Vile creatures - with a taste for the flesh of dwarves.
What they didn't count on were the duergar who had their own designs on Annuragon's Forge.
Though we would cut down every last verbeeg found within the forge, what we witnessed there would scar us for the rest of our days.

 The Order of the One Light
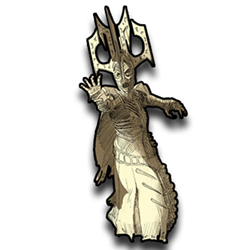
Cultists that worship the Crystal Shard like a god have found Kessell's body and infused it with arcane power, reanimating him. Now he seeks to rebuild his army and take his revenge on Icewind Dale.

 An Infernal Dispute
![]()
![]()
![]()
The Order of the One Light, they called themselves - cultists who worshipped the Crystal Shard like a god.
We found the Order's fortress - hidden within the Spine of the World. They were under siege by the forces of Levistus and had erected a magical barrier to keep the devils at bay.
We would have to recover the Netherese Keystones to bring down that barrier before we could enter the fortress and deal with the mages within.

 Order of the One Light
![]()
![]()
![]()
Crystal Cult necromancers had reanimated the corpse of Akar Kessell and granted him arcane powers he never achieved in life.
From the safety of the warded inner sanctum of their fortress, he called out to any ally that would assist his rise to power once again.
We would need to break down the sanctum's defenses before we could deal with Kessell himself, hopefully, for the last time.

 Return of the Tyrant
![]()
Kessell did not have the Shard to help him dominate creatures, but the power the cultists had given him was still dangerous.
Though few had answered Kessell's call, in time, they would grow and be a threat to the entire Dale.
Now was the time to deal with Kessell once and for all.

 The Mask of Kelvin
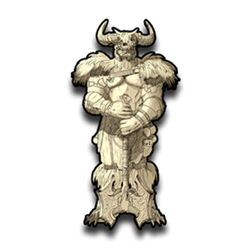
A frost giant named Utaar is attempting to break into Kelvin's Tomb and recover an artifact that he believes will help him find and claim the Crystal Shard.

 Ghosts of the Past
![]()
![]()
Kelvin's Cairn was named for the great frost giant king of old who was buried beneath it, so the legend told.
Utaar was one of the few remaining frost giant kings of Icewind Dale. He had delved deep under Kelvin's Cairn and broken the seals set by the clerics of Tempus on the Tomb of Kelvin.
Utaar's actions had disturbed the dead, and we would have to lay them back to rest before following Utaar into the catacombs of Kelvin's fallen city.

 The Broken City
![]()
![]()
![]()
Utaar sought the Mask of Melvin, believing that the artifacts of his forefather would help him recover the Crystal Shard.
To catch up with Utaar, we would have to pass through the shattered remnants of the Broken City.
But navigating to Kelvin's Tomb would be a challenge. We would need to recover the Netherese Keystones to activate the portal that would take us there.

 The Face of Kelvin
![]()
![]()
![]()
None could say what damage Kelvin's spirit would do if it was unleashed upon the Dale.
And so we delved into Kelvin's Tomb ourselves, seeking out Utaar so that we could put a stop to this madness.
But none of us were prepared for what we found there waiting in the dark. Who knew the call of the Shard was so strong.

 Crystalline Dreams
A powerful being has dominated some of the duergar stranded in Icewind Dale and has them mining chardalyn crystals and crystal remnant.

 The Floating City
![]()
![]()
![]()
Chardalyn crystales are plentiful in the ruins under Kelvin's Cairn. Their magic once helped keep Kelvin's floating city in the clouds.
But now, duergar had moved in to mine the chardalyn from the city's ruins and were trucking it down deep into the catacombs.
Four runeswords controlled the entrance to the lower mines, and we would have to light them all to press deeper into the duergar operation.

 Crystal Harvest
![]()
![]()
![]()
The dwarves had long abandoned the mines under Kelvin's Cairn due to the toxic presence of crystal remnant - the remains of Kelvin's Crystal Towers.
Such concerns were of no mattter to duergar, nor to the cultists who had come to entreat with the being the duergar served.
We would have to run the gauntlet of duergar and cultist minions before we could come face-to-face with this entity.

 A Crystal Crown
![]()
Hadegorn was the name that echoed in our minds. It was what had dominated the duergar. An aberration. A beholder.
Hagedorn was combining chardalyn and crystal remnant, using its magic to form the materials into some sort of arcane device.
We would have to defeat Hagedorn and destroy the artifact it was trying to create: its own dreamed-up manifestation of the Crystal Shard.

 The Fury of Icewind
Icewind has been terrorizing the people of the Dale for slaying her mate, Icingdeath.

 The Hunting Grounds
![]()
![]()
![]()
When Wulfgar and I slew the white dragon, Icingdeath, no tears were shed. The beast was a menace.
But now, our actions had brought Icingdeath's mate, Icewind, back to the Dale to exact her vengeance.
Some creatures were serving the dragon, bringing her prisoners in exchange for their own lives. We would root them out and discover from them where Icewind had made her lair.

 The Hall of Judgement
![]()
![]()
![]()
![]()
Icewind had made her lair within the ruined city of Netherhall atop the broken temple of Othea.
Approaching that broken city on the surface would be foolhardy even if its skies weren't patrolled by a marauding dragon.
We would approach from below, makinf our way through the catacombs under Netherhall where we would find a key to the temple gates.

 A Tomb of Ice
![]()
White dragons are simple creatures, but not without cunning. And Icewind was more cunning than most.
The dragon was baiting us to fight her on her terms. Not ideal. But if we didn't face her, she would continue to terrorize the Dale.
And so we entered the ruined Temple of Othea to face the fury of Icewind.
[img]
The Crystal Wraiths
Short Description
[img]
Act 1
![]()
![]()
![]()
Description
[img]
Act 2
![]()
![]()
![]()
Description
[img]
Act 3
![]()
![]()
![]()
Description

 Tutorial
 Trials of Tempus
 Companions of Icewind Dale
 Goblins at the Gates
 Halls of the Duergar
 Bangor's Span
 The Goblin's Shard
 The Goblin Valley
 Goffin's Door
 The Goblin Tower
 Verbeeg Jamboree
 The Verbeeg Jamboree
 Designs of the Duergar
 A Feast for all Cretins
 The Order of the One Light
 An Infernal Dispute
 Order of the One Light
 Return of the Tyrant
 The Mask of Kelvin
 Ghosts of the Past
 The Broken City
 The Face of Kelvin
 Crystalline Dreams
 The Floating City
 Crystal Harvest
 A Crystal Crown
 The Fury of Icewind
 The Hunting Grounds
 The Hall of Judgement
 A Tomb of Ice