Game Progress Route for Dark Alliance covers a recommended progression path for the main campaign of the game, it focuses on providing various points of the game to avoid any missing important aspects such as relevant Locations, NPCs, Items, as well as involved boss encounters. For guides on quests, you may check the Missions page, however, if you want to check a detailed guide for each location, please visit the Walkthrough page
Dark Alliance Game Progress Route
 Companions of Icewind Dale
Goblins at the Gates

- Reach the Portal.
- Locate the invading force's supply camp.
- Destroy the Supply camp's ballista.
- Locate the lookout in the frozen cave.
- Destroy the lookout ballista.
- Locate the bridge camp.
- Destroy the Bridge Camp ballista.
- Move to the Battlehammer Hall overlook.
- Destroy the Battlehammer Hall overlook ballista.
- Move to the Battlehammer Plaza.
- Go up to the Battlehammer Gate.
- Defeat the goblin commander and his verbeeg lieutenant.
Once you start, move forward eliminating any Enemies on your way. Don't forget to loot chests and break crystals for Materials as you advance. As you progress through the level you will find camps that house ballistas.
You have to systematically destroy them. There are four ballistas to destroy. the supply's camp ballista, the lookout ballista, the bridge camp ballista and the Battlehammer Hall overlook ballista.
After that, you will reach the Battlehammer Plaza, to eventually face Ploobo Bonesucker and Greags the Ear-lopper.
Halls of the Duergar

- Reach the Portal.
- Progress into the Halls
- Find the elevator's control lever
- Locate the duergar breaching tunnel at the bridge
- Clear the Duergar forces at the bridge
- Seal the duergar breaching tunnel at the bridge
- Locate the mining shaft entrance
- Clear the duergar forces at mining shaft entrance
- Locate the dwarven foundry
- Retrieve the explosive barrel
- Locate the mushroom cave
- Get to the main gate of Bangor's Span
- Defeat Stonegrinder
You will encounter Duergar and Trolls. It is recommended not to skip any enemy and defeat them all to loot their drops and gain additional XP. On this Act you will have to make your way to the Halls, find the elevator's lever handle, find and clear three duergar locations, then finally locate the dwarven foundry and retrieve the explosive barrel and locate the mushroom cave. A waypoint mark on your screen will always indicate you where to go to reach the objective locations but it is recommended to always explore each alternative way to find additional loot, find and destroy the duergar supplies (wooden carts) and find the Gray Stalkers and defeat them to complete the Optional objectives.
You will be able to perform a rest at the moment you have to collect the first explosive barrel, at the moment you have to collect the lever handle, after defeating two Trolls, and the last short rest becomes available after defeating three Trolls before the bost fight.
Find Stonegrinder, he uses lightning-based attacks and hits hard. Use the red barrels in the battlefield to your advantage. Once defeated you will complete the act.
On the third Act of Companions of Icewind Dale, you will encounter Duergar, Stygian Raiders and Stygian Charger. It is recommended not to skip any enemy and defeat them all to loot their drops and gain additional XP. On this Act you will have to reach Bangor's Span. A waypoint mark on your screen will always indicate you where to go to reach the objective locations but it is recommended to always explore each alternative way to find additional loot, find and destroy the duergar supplies (wooden carts) and find the Gray Stalkers and defeat them to complete the Optional objectives.
You will have multiple chances to perform a short rest: After defeating the first group of Stygian Raiders, and another one after defeating the second group of Stygian Raiders. There's another short rest after crossing a wooden bridge and defeat some Duergar and then the last short rest becomes available when you find the last ballista after defeating the Duergar and the Stygian Raiders.
You will find a lever that lowers a wooden platform. Jump on it and them jump to your right. collect the chest and the gold sacks and then activate the lever to cross the spikes without problem. Head to the elevator and activate the lever here too. A cutscene will trigger. You will be tossed directly into the boss battle after the cutscene, you will have to face Garnn & Murdunn. Garnn is the one with the shield, and Murdunn is the spellcaster. Duergar will spawn during the fight so be mindful of that. Defeat them.
 The Goblin's Shard
The Goblin Valley

- Reach the Portal
- Reach the goblin's first outpost
- Retrieve the explosive barrel at the goblin's first outpost.
- Reach the goblin arena
- Retrieve the explosive barrel at the goblin arena
- Reach the accident site
- Reach the goblin fort
- Defeat Slugvogg
On the first Act of The Goblin's Shard, you will encounter Goblins and Verbeeg. It is recommended not to skip any enemy and defeat them all to loot their drops and gain additional XP. On this Act you will have to make your way to the indicated locations and retrieve the four explosive barrels, a short rest will become available at each location after defeating the enemies that guard the collectable explosive barrels that you must gather.. You may encounter zones with poisonous plants. If you get caught by its effect you will gain the Poisoned status effect for a short period. Avoid staying close to those plants and sprint quickly if you have to cross an area full of them. A waypoint mark on your screen will always indicate you where to go to reach the objective locations but it is recommended to always explore each alternative way to find additional loot, find the goblin supplies (wooden carts) and find Screetch the Foreman and defeat him to complete the Optional objectives. In this level you may find portal shortcuts that lead to hidden areas.
Once you retrieved the four explosive barrels, head to the fort gate and deploy the four explosive barrels there to open the gate. Face the Goblins and Slugvogg.
Goffin's Door
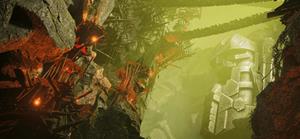
- Reach the Portal.
- Enter Rugrib's Quarter
- Retrieve the runestone from the goblin guard post
- Reach the cracked halls
- Retrieve the runestone at crack halls
- Reach the Broken Bridge
- Retrieve the Runestone on the Broken Bridge
- Reach the Goblin Prison Camp
- Retrieve the Runestone at the goblin prison camp
- Enter the fort guarding Goffin's Door
- Seal Goffin's Door
- Defeat Vrogulb Frostgrip and his minions
On the second Act of The Goblin's Shard, you will encounter Goblins, Verbeeg and Duergar. It is recommended not to skip any enemy and defeat them all to loot their drops and gain additional XP. On this Act you will have to make your way to four locations to find and retrieve the runstones on each location. At each runestone location there will be a group of enemies that guard the runestone, a short rest will become available at each location after you defeat them. A waypoint mark on your screen will always indicate you where to go, to reach the objective locations but it is recommended to always explore each alternative way to find additional loot, find the Dwarven Mugs, also find Yuuk Ratbane and defeat him to complete the Optional objectives.
Once you found the four runestones, head to the fort gate. Place the four runestones on the placeholders on the ground.
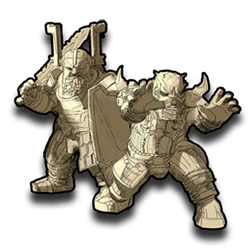
Vrogulb Frostgrip, Icebiter and Nelgand the Slurper will come out from the hatch doors on the ground. It is recommended to use the ultimate and focus all your attacks to one of these enemies to defeat 1 one them as quick as you can. Icebiter will inflict Cold Damage. Nelgand the Slurper fights like a Verbeeg. And Vrogulb Frostgrip will cast ranged attacks. Defeat them to complete the Act and the Quest.
The Goblin Tower

- Reach the Portal
- Reach Hamboog's Crystal Tower
- Eliminate Gorn the Disheveled
- Eliminate Kroolpee the Putrid
- Eliminate Burchazz the Nimble
- Eliminate Knox the Pain Lover
- Defeat Emperor Hamboog
On the third Act of The Goblin's Shard, you will encounter Goblins and multiple Goblin Booyahgs. It is recommended not to skip any enemy and defeat them all to loot their drops and gain additional XP. On this Act you will have to make your way to Hamboog's Crystal Tower, this locations doesn't have as many alternative way as Act I and Act II, but it has better loot. A waypoint mark on your screen will always indicate you where to go, to reach the objective locations but it is recommended to always explore each alternative way to find additional loot. This Act has no optional quests.
A short rest becomes available after you defeat the second group of Goblins. And there's another short rest not very far from the first one after defeating a group of Goblins, Duergar and a Verbeeg.
 Verbeeg Jambore
The Verbeeg Jamboree

- Reach the Portal
- Locate the verbeeg camp
- Defeat the Verbeeg at the camp
- Find the missing Verbeeg
- Defeat Gutnir Widebelly
On the first Act of Verbeeg Jamboree, you will encounter Goblins, Duergar, Verbeeg and Gnolls. It is recommended not to skip any enemy and defeat them all to loot their drops and gain additional XP. On this Act you will have to make your way to the Verbeeg Camp and then find the missing Verbeeg, Gutnir Widebelly. A waypoint mark on your screen will always indicate you where to go to reach the objective locations but it is recommended to always explore each alternative way to find additional loot, find and destroy the Weapon Racks, then find Flicker the Toe Thief and defeat him to complete the Optional objectives.
A short rest will become available after you defeat the first Goblin Booyahg you encounter, another one after you defeat a Troll in a blue area, and then after you encounter a Gnoll. When you defeat the Verbeeg at the camp there's another available short rest.
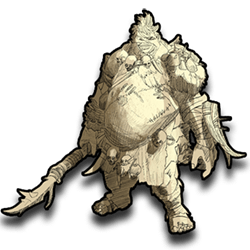
Gutnir Widebelly will spawn at the gate. He is like a common Verbeeg with more health, if you saved your ultimate, use it against him to finish him off quickly.
Designs of the Duergar

- Reach the Portal
- Reach the submerged cavern
- Reach Annuragon's Tomb
- Retrieve the Annuragon's Tomb's runestone
- Locate Gruuln Threechin
- Retrieve the runestone from Gruuln Threechin
- Reach the statue of Annuragon
- Retrieve the runestone near Annuragon's statue
- Reach the mushroom field
- Retrieve the runestone hidden at the mushroom field
- Locate the runestone sockets
- Place all of the runestones to gain entry to Annuragon's Forge
- Defeat Thurn Dreamreader
On the second Act of Verbeeg Jamboree, you will encounter Goblins, Duergar, Verbeeg and Gnolls. It is recommended not to skip any enemy and defeat them all to loot their drops and gain additional XP. On this Act you will have to make your way to Annuragon's Tomb, then locate Gruuln Threechin and defeat him, reach the statue of Annuragon, then to the mushroom field. On each of these locations you will be able to collect a runestone. Once you have the four runestones head to Annuragon's Forge entrance and defeat Thurn Dreamreader. A waypoint mark on your screen will always indicate you where to go to reach the objective locations but it is recommended to always explore each alternative way to find additional loot, find and destroy the Dwarven Mugs, then find Hoarks Shalefoot and defeat him to complete the Optional objectives.
A short rest will become available after you defeat a group of Goblins and Duergar, the next short rest is found after you defeat Gruuln Threechin. Another one is available after you defeat the Trolls to retrieve the runestone near Annuragon's Statue. And the last one at the mushroom field.
A Feast for All Cretins

- Reach the Portal
- Place the missing runestone to gain entry to Annuragon's Forge
- Fight through to the forge
- Defeat The Chef
On the third Act of Verbeeg Jamboree, you will encounter Verbeeg, Duergar, Goblins and Goblin Booyahg. It is recommended not to skip any enemy and defeat them all to loot their drops and gain additional XP. On this Act you will have to enter Annuragon's Forge and make your way to through it to find and defeat The Chef. A waypoint mark on your screen will always indicate you where to go to reach the objective locations but it is recommended to always explore each alternative way to find additional loot.
A short rest will become available after you defeat the first group of Verbeeg, Goblins and Duergar after crossing the gate. The second short rest is found after crossing a concrete bridge and defeating another group of Verbeeg, Goblins and Duergar. The third short rest is at the railway you will find after climbing a ladder
 The order of the One Light
An Infernal Dispute

- Reach the Portal
- Reach the gateway to the Wounded Mountain
- Defeat the guardian of the Wounded Mountain
- Retrieve the Netherese Keystone at the gateway to the Wounded Mountain
- Reach the Blackburn Gate
- Retrieve the Netherese Keystone outside the Blackburn Gate
- Reach the Blackburn Caverns
- Defeat the stygians within the Blackburn Caverns
- Retrieve the Netherese Keystone inside the Blackburn Caverns
- Reach the entry to the broken bridge
- Defeat the forces holding the broken bridge
- Retrieve the Netherese Keystone at the entry to the broken bridge
- Place all four Netherese Keystones to deactivate the magical barrier
- Cross the broken bridge
- Find the stygian siege commander within the outer fortress
- Defeat Skornn Soulreaver
On the first Act of The Order of the One Light, you will encounter Stygian Raiders, Stygian Charger and Cultists. It is recommended not to skip any enemy and defeat them all to loot their drops and gain additional XP. On this Act you will have to make to find and gather the Netherese Keystones, to deactivate the magical barrier near the end of the mission and gain access to Skornn Soulreaver and defeat him. You may encounter zones with icy ground that you will be able to cross without getting harmed by approach a firesword nearby. If you step on icy ground you will suffer Cold Damage and you may gain Slowed status effect for a short period. A waypoint mark on your screen will always indicate you where to go to reach the objective locations but it is recommended to always explore each alternative way to find additional loot, find and destroy the cultist urns, find the First Pick crew and defeat them to complete the Optional objectives.
You will be able to perform a short rest when you reach the Blackburn Gate after defeating the enemies. There's another short rest available after you defeat the forces holding the broken bridge and the last short rest is available after crossing the broken bridge.
Order of the One Light

- Reach the Portal
- Enter the cultist fortress
- Reach the access corridor
- Defeat the cultist forces guarding the urn at the access corridor
- Destroy the urn at the access corridor
- Reach the mining pit
- Reach the entry to the Inner Sanctum
- Defeat Kronus Seven Scars
On the second Act of The Order of the One Light, you will encounter Duergar, Trolls, Stygian Raiders, Stygian Charger and Cultists. It is recommended not to skip any enemy and defeat them all to loot their drops and gain additional XP. On this Act you will have to make your way to find and destroy the urns to be able to reach the Boss fight area at the end. You may encounter zones with icy ground that you will be able to cross without getting harmed by approach a firesword nearby. If you step on icy ground you will suffer Cold Damage and you may gain Slowed status effect for a short period. A waypoint mark on your screen will always indicate you where to go to accomplish the next objective but it is recommended to always explore each alternative way to find additional loot, find the soul coins and find Wennir the Consumed and defeat him to complete the Optional objectives.
When you defeat the first group of Duergar and Cultists, a short rest will become available. You will be able to perform a short rest again when you reach the mining pit after defeating the enemies around. If you find and defeat Orun Bentblade and the group of enemies with him, another short rest will be also available. And before entering the final boss area, you will encounter two Stygian Chargers near the edge to the front, a short rest will become available after you defeat them.
Return of the Tyrant

- Reach the Portal
- Fight through the forces guarding the elevator to the tower-top
- Take the elevator to the tower top
- Approach the altar
- Defeat Akar Kessell, the Dead Tyrant of Icewind Dale
On the third Act of The Order of the One Light, you will encounter Cultists and Duergar. It is recommended not to skip any enemy and defeat them all to loot their drops and gain additional XP. On this Act you will have to make defeat some groups of enemies through a long bridge to take an elevator, to the next area where you'll have to fight Akar Kessel. You may encounter zones with icy ground that you will be able to cross without getting harmed by approach a firesword nearby. If you step on icy ground you will suffer Cold Damage and you may gain Slowed status effect for a short period. A waypoint mark on your screen will always indicate you where to go to accomplish the next objective but it is recommended to always explore each alternative way to find additional loot.
 The Mask of Kelvin
Ghosts of the Past

- Reach the Portal
- Reach the mushroom garden
- Purge the Tempus Shrine at the mushroom garden
- Reach the withered orchard
- Purge the Tempus shrine at the withered orchard
- Reach the sunset plaza
- Purge the Tempus shrine at the sunset plaza
- Reach the crystal outcrop
- Purge the Tempus shrine at the crystal outcrop
- Take the portal and reach the soul well
- Use the pressure plates to restore the Tempus seal on the soul well
- Defeat the Husk of Torult Dragonbane
On the first Act of The Mask of Kelvin, you will encounter Goblins, Goblin Booyahg, Goblin Captain, Verbeeg, Wraith, Frost Giants and Trolls. It is recommended not to skip any enemy and defeat them all to loot their drops and gain additional XP. On this Act you will have to make your way and purge four Tempus Shrines, where you'll have to fight a wave of enemies to be able to perform a short rest. You may encounter zones with icy ground. If you step on icy ground you will suffer Cold Damage and you may gain Slowed status effect for a short period. There are fireplaces and firesword from where you can gain the Warmth effect to avoid getting any damage by walking through the icy ground and explore new ways, these fireplaces are sometimes hidden by some rocks you'll have to wreck off to be able to find them. Avoid stepping on icy ground when it's possible or sprint quickly out of it. A waypoint mark on your screen will always indicate you where to go to reach the objective locations but it is recommended to always explore each alternative way to find additional loot, find the cursed giant urns and destroy them, and find Juurn the Twice Risen and defeat him to complete the Optional objectives.
The Broken City

- Reach the Portal
- Reach the entrance to the Broken City
- Defeat the monsters at the entrance to the Broken City
- Retrieve the Netherese Keystone at the entrance to the Broken City
- Reach the fallen arena
- Defeat the monsters protecting the Netherese Keystone at the fallen arena
- Retrieve the Netherese Keystone at the fallen area
- Reach Kelvin's Courtyard
- Pick up the Netherese Keystone on the Frost Giant at Kelvin's Courtyard
- Reach the floating tower
- Pick up the Netherese Keystone at the floating tower
- Reach the central Island Netherese Gate
On the second Act of The Mask of Kelvin, you will encounter Goblins, Goblin Booyahg, Goblin Captain, Verbeeg, Wraith, Frost Giants and Trolls. It is recommended not to skip any enemy and defeat them all to loot their drops and gain additional XP. On this Act you will have to make your way to retrieve four runestones from different enemies, you will be able to perform a short rest each time your enemies from a runestone. You may encounter zones with icy ground. If you step on icy ground you will suffer Cold Damage and you may gain Slowed status effect for a short period. There are fireplaces and firesword from where you can gain the Warmth effect to avoid getting any damage by walking through the icy ground and explore new ways, these fireplaces are sometimes hidden by some rocks you'll have to wreck off to be able to find them. Avoid stepping on icy ground when it's possible or sprint quickly out of it. A waypoint mark on your screen will always indicate you where to go to reach the objective locations but it is recommended to always explore each alternative way to find additional loot, find the Noxious Troll Sacs and destroy them, and find Wrigglin' Wolly and defeat him to complete the Optional objectives.
The Face of Kelvin

- Reach the Portal
- Traverse the broken bridge
- Pass Through Kelvin's Plaza
- Traverse the floating island
- Reach the entrance to the Tomb of Kelvin
- Defeat Druunr, Jarl of the Frostfields
- Take the elevator to Kelvin's Sarcophagus
- Defeat the Spirit of Kelvin
On the third Act of The Mask of Kelvin, you will encounter Goblins, Verbeeg, Wraith and Frost Giant. It is recommended not to skip any enemy and defeat them all to loot their drops and gain additional XP. On this Act you will have to make your way traverse the broken bridge and the floating island, reach the entrance to the Tomb of Kelvin which is guarded by a mini-boss: Druunr, Jarl of the Frostfields. You may encounter zones with icy ground. If you step on icy ground you will suffer Cold Damage and you may gain Slowed status effect for a short period. There are fireplaces and firesword from where you can gain the Warmth effect to avoid getting any damage by walking through the icy ground and explore new ways, these fireplaces are sometimes hidden by some rocks you'll have to wreck off to be able to find them. Avoid stepping on icy ground when it's possible or sprint quickly out of it. A waypoint mark on your screen will always indicate you where to go to reach the objective locations but it is recommended to always explore each alternative way to find additional loot.
There's a short rest after the broken bridge available. A new short rest is available half-way while traversin the floating island, and another one after traversing it. The last short rest becomes available after defeating Druunr, Jarl of the Frostfields.
 Crystalline Dreams
The Floating City

- Reach the Portal
- Reach the ruined courtyard
- Activate the runesword in the ruined courtyard
- Reach the garden temple
- Activate the garden temple runesword
- Reach the ruined temple
- Defeat the forces present at the temple entrance
- Activate the ruined temple runesword
- Reach the gate to the lower mines
- Defeat Arim the Bonescribe
On the first Act of Crystalline Dreams, you will encounter Duergar, Cultists, Verbeeg and Trolls. It is recommended not to skip any enemy and defeat them all to loot their drops and gain additional XP. On this Act you will have to make your way to activate the runeswords, this location is not very linear. You may encounter zones with poisonous plants or poisonous ground. If you step on poisonous ground or stay close to a poisnous plant, you will get Poison damage and maybe gain the Poisoned effect. Poisonous plants can be dodge by sprinting through them quickly. Poisonous ground can be cleared with explosives. A waypoint mark on your screen will always indicate you where to go to reach the objective locations but it is recommended to always explore each alternative way to find additional loot, destroy the giant urns and find Horbolt Redpick and defeat him to accomplish the optional objectives for extra experience.
There is a short rest available after fighitng the first group of Cultists and Duergar. There next short rests are available right before activating the runeswords.
Crystal Harvest

- Reach the Portal
- Reach the mine entrance
- Defeat the defenders holding the mine entrance
- Reach the old mining shaft
- Destroy the duergar defenses at the mining shaft
- Reach the old lookout
- Reach the junction at the broken Netherse Gate
- Destroy the duergar defenses at the junction
- Find the cultist chamber in the mine tunnels
- Defeat the cultists in the mine tunnels
- Reach the gate to the deep cavern
- Defeat Fenji Coldeye
On the second Act of Crystalline Dreams, you will encounter Duergar, Cultists and Verbeeg. It is recommended not to skip any enemy and defeat them all to loot their drops and gain additional XP. On this Act you will have to make your way to defeat the enemy defenses and destroy their ballistas, then defeat the Cultists in the mine tunnels. You may encounter zones with poisonous plants or poisonous ground. If you step on poisonous ground or stay close to a poisnous plant, you will get Poison damage and maybe gain the Poisoned effect. Poisonous plants can be dodge by sprinting through them quickly. Poisonous ground can be cleared with explosives. A waypoint mark on your screen will always indicate you where to go to reach the objective locations but it is recommended to always explore each alternative way to find additional loot, destroy the duergar supplies (Duergar Supplies are wooden carts) and find the Scarred Ones and defeat them to accomplish the optional objectives for extra experience.
A short rest will become available after defeating a group of Duergar, Verbeeg and Cultists while you are trying to reach the old mining shaft. Another short rest can be found after defeat a group of Verbeeg while you reach the old lookout.
A Crystal Crown

- Reach the Portal
- Reach the old collapsed mine entrance
- Defeat the last of Hagedron's defenders
- Use the portal and enter Hagedorn's Lair
- Defeat Hagedorn
Go to the front, before you reach the portal, there's a Tablet on its left. Go through the portal. Climb to the left, defeat the Duergar. Avoid getting surrounded by them. There's a tome on the left. Go to the front, follow the railway, destroy the explosive barrel with a ranged attack to clear the toxic field. Loot the chest. Take the portal, to the right corner there's a chest, move forward, jump down to the next area. Defeat the Verbeeg and the Cultists. A short rest will be available at this point. Follow the waypoints to the portal. Go through it to the next area, you may skip the cutscene if you want to.
If you saved your ultimate for the final boss, use it now. Wait until Hagedorn attacks you, dodge it and attack it while its animation leaves it exposed for a short time. Keep distance whenever it launches energy balls around, use ranged attacks. When it floats while it make thunder attacks, Hagedorn becomes Inmune, so focus on dodging. Stay close to edge of the platform and whenever Hagedorn makes it's strongest attack, you must jump to the closest platform around quickly. Defeat Hagedorn.
 The Fury of Icewind
The Hunting Grounds

- Reach the Portal
- Reach the abandoned Reghed camp
- Defeat the hunters at the abandoned Reghed camp
- Reach the fallen spire
- Defeat the hunters at the fallen spire
- Activate the runesword at the fallen spire
- Pass through the Spire of Kelvin to reach the frozen courtyard
- Defeat the hunters in the frozen courtyard
- Reach the Hunter's Camp
- Defeat Narf Twelvefingers
On the first Act of The Fury of Icewind, you will encounter Goblins, Verbeeg, Wraith, Gnolls and Duergar. It is recommended not to skip any enemy and defeat them all to loot their drops and gain additional XP. On this Act you will have to make your way to find and activate the runeswords, and then find the hunter's camp to defeat Narf Twelvefingers. You may encounter zones with icy ground. If you step on icy ground you will suffer Cold Damage and you may gain Slowed status effect for a short period. There are fireplaces and firesword from where you can gain the Warmth effect to avoid getting any damage by walking through the icy ground and explore new ways, these fireplaces are sometimes hidden by some rocks you'll have to wreck off to be able to find them. Avoid stepping on icy ground when it's possible or sprint quickly out of it. A waypoint mark on your screen will always indicate you where to go to reach the objective locations but it is recommended to always explore each alternative way to find additional loot, find and defeat Chezzel RotClaw, find and unlock the Shrine, find and destroy the holding cages (these require an explosive barrel that you have to find around), for the optional objectives and gain extra experience.
The Hall of Judgement

- Reach the Portal
- Reach the dragon spine courtyard
- Pass under the courtyard to the Netherhall Gate
- Defeat the Netherhall Gate guardians
- Reach the broken bridge
- Defeat the guardians at the broken bridge
- Activate the portal at the broken bridge with the lost Netherese Keystone
- Reach the giant mausoleum
- Activate the mausoleum gate with the missing lever
- Defeat the mausoleum guardians
- Reach the Hall of Judgement
- Defeat Bjorn
On the second Act of The Fury of Icewind, you will encounter Goblins, Verbeeg and Wraith. It is recommended not to skip any enemy and defeat them all to loot their drops and gain additional XP. On this Act you will have to make your way to defeat several groups of enemies at different locations, after this, you have to retrieve a lever and place it at the gate of the Mausoleum, defeat their guardians and encounter Bjorn at the Hall of Judgement. You may encounter zones with icy ground. If you step on icy ground you will suffer Cold Damage and you may gain Slowed status effect for a short period. There are fireplaces and firesword from where you can gain the Warmth effect to avoid getting any damage by walking through the icy ground and explore new ways, these fireplaces are sometimes hidden by some rocks you'll have to wreck off to be able to find them. Avoid stepping on icy ground when it's possible or sprint quickly out of it. A waypoint mark on your screen will always indicate you where to go to reach the objective locations but it is recommended to always explore each alternative way to find additional loot, find and defeat Nathourn the Spiteful, find and destroy the giant urns to complete optional objectives and gain extra experience.
A Tomb of Ice

- Reach the Portal
- Reach the ruined Temple of Othea
- Defeat Icewind
- Activate Ballista
- Fire Ballista
- Defeat Icewind
Reach the ruined Temple of Othea: Move forward, behind the elevator there's a Relief on the right corner. Go back to the elevator, press both pressure plates and go up. The elevator is very long. You skip the cutscene if you want to.
Defeat Icewind: Icewind fires cold damage through her mouth. If you are not close enough, it will be hard to avoid getting damaged by the cold. If you are melee hitting in, pay attention to the front feet, if it lifts one, jump back quickly to avoid getting hit.
Activate Ballista: Icewind will become invulnerable and fly away making a wind storm after you've taken a small part of her health. Take the way to the side, to the ballista, it will be guarded by Goblins. Defeat them to remove the force field over the ballista.
Fire Ballista: Hit the ballista to fire at Icewind.
Defeat Icewind: Return to the center and defeat the Goblins around, to charge your Ultimate while Icewind is not at range. When Icewind comes to ground, use your Ultimate against her if you fully charged it
(This process must be repeated a few times until Icewind is defeated)


 The Goblin's Shard
 Verbeeg Jambore
 The order of the One Light
 The Mask of Kelvin
 Crystalline Dreams
 The Fury of Icewind